Other
For the connection between REDDOXX Cloud Tenant and a local directory service you need:
- access to the public DNS configuration of your domain to be connected
- the REDDOXX Cloud Connector
- a read-authorised account to your directory
- a Windows system on which the REDDOXX Cloud Connector can be installed
- use the link https://admin.cloud.reddoxx.com and click on "Create new tenant"
- select "Other" to create a tenant that is to be set up for an OnPremise environment. Click on "Continue"
- enter an email address associated with your OnPremise environment for registration
You will then receive a confirmation email and a DNS TXT record that must be stored in your DNS for the domain to be registered
Then click on the link in the email to finalise the setup - assign a secure password and specify the name of the tenant
- click on Create tenant
If you already know inclusion or exclusion criteria for archiving, you can create these under Email Archive => Policies.
The rules are processed in the visible order. The first rule that matches is applied, all following rules are ignored.
You can move the rules using the ≡ symbol.

- click on "+ Add"
- provide a name for the rule and set the action (archive / don´t archive)
- specify the criteria in the Subject pattern, Sender pattern, Recipient Patterns and Size Filters tabs. Please note that the criteria are AND-linked.
- "Save" the rule
In the Tenant => Configuration area, you will find the tenant e-mail address that you enter as the target address in the journaling of your e-mail server.
To establish a connection between your OnPremise environment and the REDDOXX Cloud Tenant, you need the REDDOXX Cloud Connector.
You install this locally on a Windows system from which the local directory is accessible.
You need the following parameters to configure the REDDOXX Cloud Connector:
- the API Url: https://connector.cloud.reddoxx.com
- the Access Token, which you can create in the REDDOXX Cloud Tenant under Tenant => Access Token
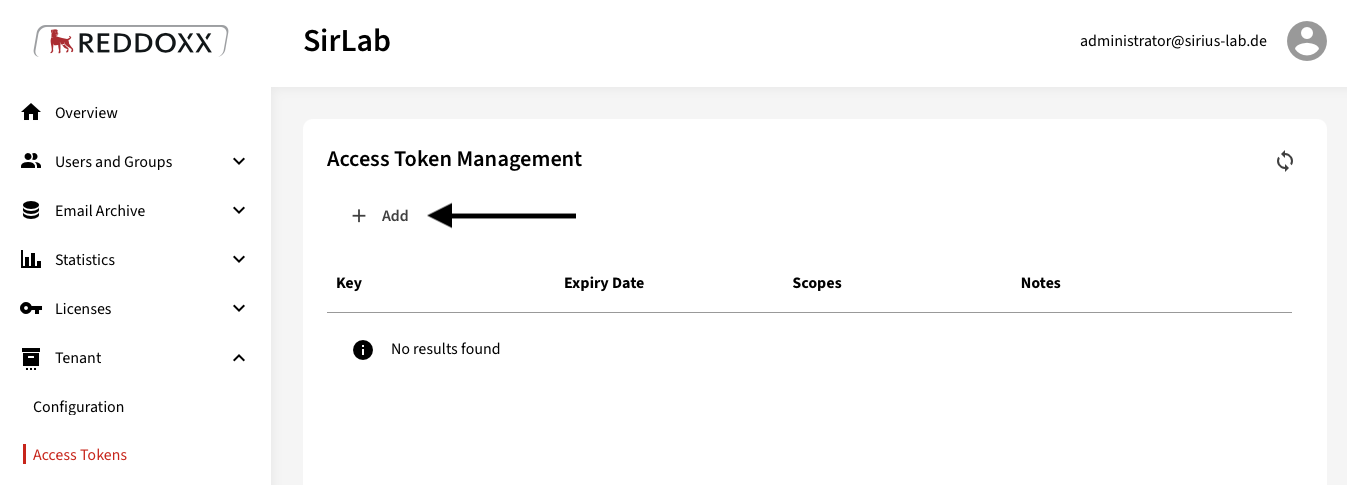
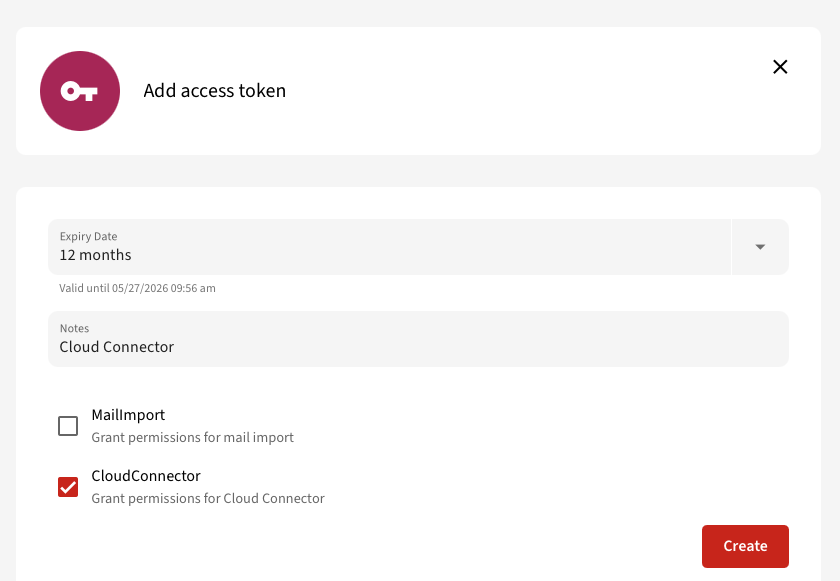
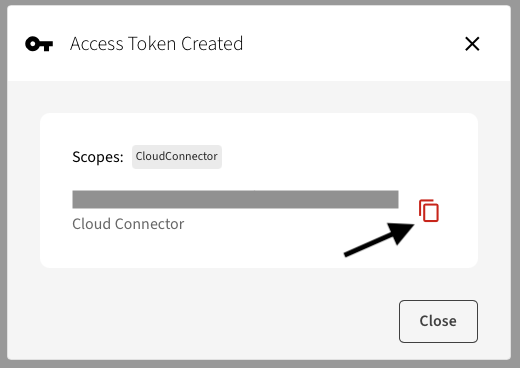
- the Active Directory credentials
Now save the settings of the REDDOXX Cloud Connector so that it can be started.
Then edit the settings in the REDDOXX Cloud Tenant => Tenant => Configuration on the edit icon:

Select "Use REDDOXX Cloud Connector for user authentication" and save the settings:
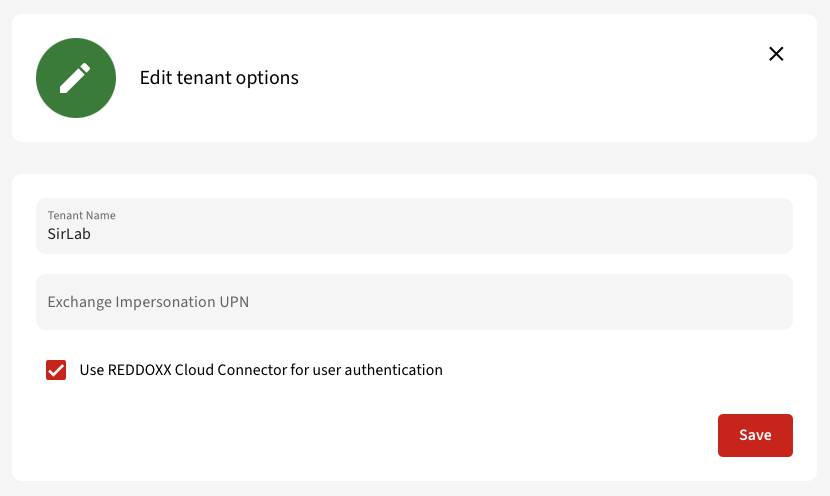
You can now synchronise the tenant with the REDDOXX Cloud Connector:
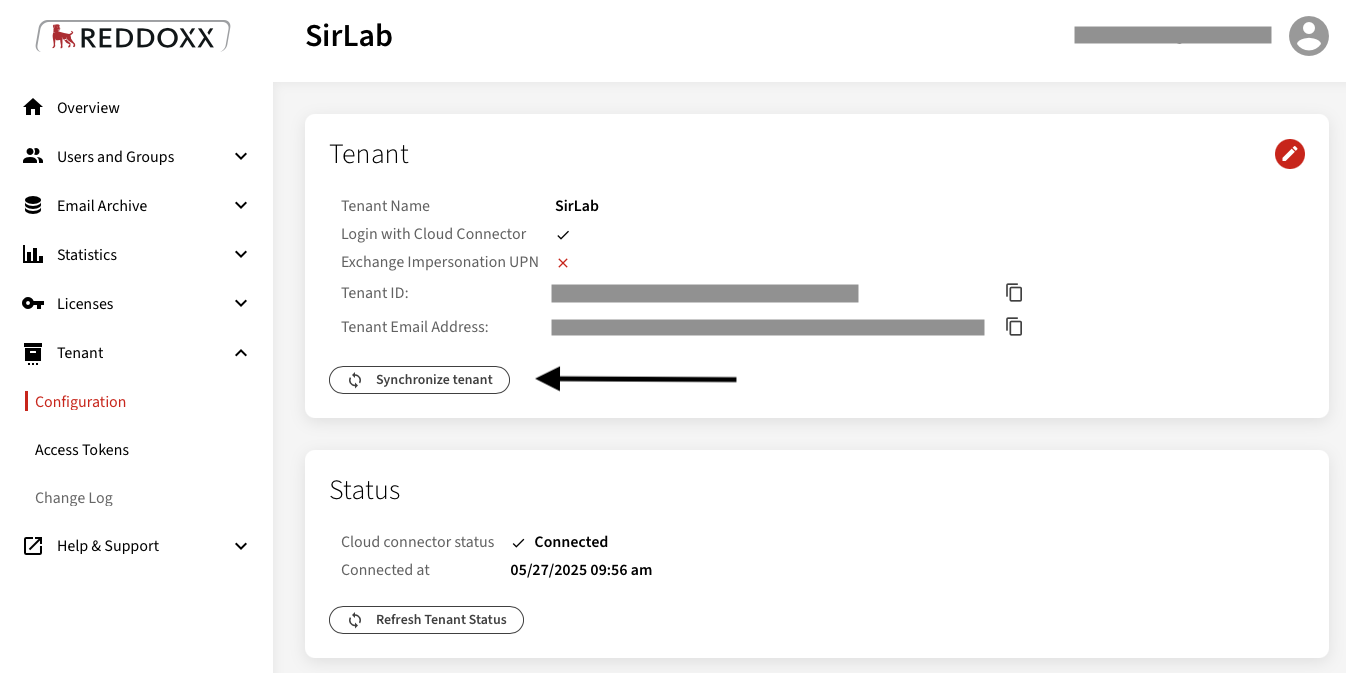
Please note: If the Cloud Connector is used for login, the tenant admin will also have to log in with the AD credentials in future.
Only the users whose addresses belong to the already authorised domain are imported.
If there are users with multiple addresses of one or more other domains, these domains must also be added additionally to the initially authorised domain in the Users and groups => Domains area via "Add" (a DNS TXT record must also be set up for the corresponding domains, the necessary record is specified when adding).